搜索到
183
篇与
的结果
-
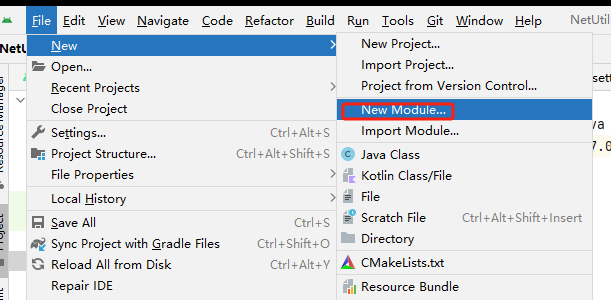
 在 Jitpack 上发布开源项目(基于 Gradle 8.2) 最近比较闲,更新了一下 android studio 版本(2023.1.1 Patch 1),默认创建的工程使用的是 gradle8.2 的版本,发布开源的 android library 和之前的(gradle 6.5)不太一样了,记录一下。有 gradle 新老版本使用基础的,建议看省流版https://blog.1okk.com/archives/148.html理论上 高版本 gradle 发布 jitpack 的教程本文通用。创建工程创建 app正常创建即可,可以带一个 app(作为手机上测试用)。也可以创建不带 activity 的,然后删除,在根 build.gradle 中删除引用,引用新的(新建的模块)。创建模块创建完工程之后按如下方法创建一个 Module然后编写相关代码。如果有 app 的话(用于手机启动界面测试模块),配置一下 app 引用 模块ctrl+alt+shift+s 打开 project structure 勾选 -> ok配置 jitpack 编译1. 在根 build.gradle 中添加jitpack(应该不添加也行,手册上让咱加,咱加上)新版本 gradle 配置方式稍有变化,详情看https://docs.gradle.org/current/userguide/writing_settings_files.html打开 setting.gradle,在 dependencyResolutionManagement 中的 repositories 块中 添加 jitpack 仓库dependencyResolutionManagement { …… repositories { …… maven { url "https://jitpack.io" allowInsecureProtocol = true // 如果 url 为 http 协议,需要添加此项;https 可不用 } } }完整代码如下2. 修改模块(要发布的开源项目)中的 build.gradle在 plugins 块中添加 maven-publish 插件添加新块 afterEvaluate ,并添加调用上传代码模块(否则不会上传代码,不会生成aar)添加上传源码的task sourceJarplugins { …… id 'maven-publish' } afterEvaluate { publishing { // 当前依赖库的版本号,方便我们开发者自己查看,同时发布到 MavenLocal 也是用的这个版本号(Jitpack不会使用到) def versionName = "1.0.0" publications { release(MavenPublication) { // 自定义属性 这里头是artifacts的配置信息,不填会采用默认的 groupId = 'net.moao.netutils' // 依赖库的 Group Id(Jitpack不会使用到) artifactId = 'netutils' // 依赖库的名称,单组件发布时随意填写,多组件时即为此组件的 ArtifactId(Jitpack不会使用到) version = versionName // 增加上传源码的 task artifact sourceJar // 必须有这个 否则不会上传AAR包 将bundleReleaseAar任务的单个输出文件作为发布的AAR文件。这样,该AAR文件就会成为 MavenPublication 的 artifact 并进行发布 afterEvaluate { artifact(tasks.getByName("bundleReleaseAar")) } } } } } // 增加上传源码的task task sourceJar(type: Jar) { from android.sourceSets.main.java.srcDirs archiveClassifier = "sources" }3. 创建 jitpack.yml 指定 jitpack 使用的 java 版本高版本 gradle 在编译时对 java 版本有要求创建一个 jitpack.yml 文件(在根目录创建),指定 jitpack 构建时使用的 java 版本,gradle8.2 对应 java 版本为jdk17,所以配置如下jitpack.yml:before_install: - sdk install java 17.0.7-open - sdk use java 17.0.7-open jdk: - openjdk17至此配置完毕。可以直接发布了,也可以本地测试一下,看看有什么问题。本地测试编译执行如下命令本地编译(./ 代表当前路径下的..)./gradlew publishToMavenLocal编译成功没有问题,开始发布。发布将代码上传到 github 或者 gitee 平台(jitpack现已支持码云Gitee),这里以 Gitee 为例。创建好仓库后,将代码上传。在发行版 处 点击 全部填好标签、标题和表述,不需要上传文件(我们使用 jitpack 自动构建),点击创建发行版。之后在 jitpack 官网操作发行:打开(jitpack 官网)[https://jitpack.io/],使用 github 账号就能登录。在 输入框 中输入 项目地址 或者 com.gitee.用户名/项目名(github 同理),点击look up。找到想要发布的标签,点击 get it。等待 Log 处 标志 变为 绿色就可以了。发布成功后,可在其他项目中引用(多项目的话方便管理),或给其他人用。Log 如果变为红色,则代表出问题了,点击一下可以查看日志,根据日志 修改就行本文参考链接:https://docs.jitpack.io/building/#android-projectshttps://docs.jitpack.io/android/#publish-an-android-libraryhttps://developer.android.com/studio/build/maven-publish-pluginhttps://docs.gradle.org/current/userguide/publishing_maven.htmlhttps://blog.csdn.net/h_bpdwn/article/details/136479903
 -
-
-
Python 简单的网页列表文件脚本 功能可控制√是否允许下载√是否允许打包下载文件夹设置忽略文件(规划中。。。)√设置监听地址√设置监听端口代码import argparse from flask import Flask, send_file import os import zipfile app = Flask(__name__) def list_files(startpath, allow_file_download, allow_folder_zip_download, indent=""): file_list = "" for root, dirs, files in os.walk(startpath): level = root.replace(startpath, '').count(os.sep) indent_str = " " * (level) folder_name = os.path.basename(root) if allow_folder_zip_download: file_list += f"{indent}{indent_str}<strong>{folder_name}</strong> <a href='/zipdownload/{root}'><button>Download as ZIP</button></a><br>" else: file_list += f"{indent}{indent_str}<strong>{folder_name}</strong><br>" subindent = " " * (level + 1) for f in files: if allow_file_download: file_list += f"{indent}{subindent}<a href='/download/{os.path.join(root, f)}'>{f}</a><br>" else: file_list += f"{indent}{subindent}{f}<br>" return file_list @app.route('/') def index(): start_path = '.' # Change this to the desired directory file_list = list_files(start_path, args.allow_file_download, args.allow_folder_zip_download) return file_list @app.route('/download/<path:filename>') def download_file(filename): if args.allow_file_download: return send_file(filename, as_attachment=True) else: return "File download is not allowed." @app.route('/zipdownload/<path:folder>') def zip_download(folder): if args.allow_folder_zip_download: folder_name = os.path.basename(folder) zipf = zipfile.ZipFile(f'{folder_name}.zip', 'w', zipfile.ZIP_DEFLATED) for root, dirs, files in os.walk(folder): for file in files: zipf.write(os.path.join(root, file)) zipf.close() return send_file(f'{folder_name}.zip', as_attachment=True) else: return "Folder zip download is not allowed." if __name__ == '__main__': parser = argparse.ArgumentParser(description='Flask App with File Download Options') parser.add_argument('--host', default='0.0.0.0', help='Host address to listen on') parser.add_argument('--port', type=int, default=22222, help='Port to listen on') parser.add_argument('--allow_file_download', action='store_true', default=False, help='Allow file download') parser.add_argument('--allow_folder_zip_download', action='store_true', default=False, help='Allow folder zip download') args = parser.parse_args() app.run(host=args.host, port=args.port)